概要
SpringSecurityを導入してユーザ認証機能を実現します。
まずはログイン認証機能が使えるようになることを目標にしていますので、
本記事で解説する構成は最小限にとどめています。
準備
SpringSecurityで認証機能を実装できるように、まずは環境を準備します。
構成管理
本記事では構成管理はMavenを使用しています。
Mavenではpom.xmlにSpringSecurityを追加することで利用可能になります。
ユーザテーブル
ユーザ情報を格納するテーブルを作成します。
ユーザID、名前、パスワード、ロールがあればよいです。
以下は慣例として、作成日時等の共通カラムも含めたDDLです。
|
1 2 3 4 5 6 7 8 9 10 11 12 13 14 15 16 |
-- DDL CREATE TABLE `book_management`.`customer` ( `id` VARCHAR(100) NOT NULL, `name` VARCHAR(100) NOT NULL, `password` VARCHAR(100) NOT NULL, `role` VARCHAR(50) NOT NULL, `created_user` VARCHAR(100) NOT NULL, `created_at` DATETIME NOT NULL, `updated_user` VARCHAR(100) NOT NULL, `updated_at` DATETIME NOT NULL, `deleted_user` VARCHAR(100) NULL, `deleted_at` DATETIME NULL, `version` INT NOT NULL, PRIMARY KEY (`id`)) ENGINE = InnoDB DEFAULT CHARACTER SET = utf8mb4; |
|
1 2 3 4 5 6 7 8 9 10 11 12 13 14 15 16 17 |
-- インポートデータ INSERT INTO `book_management`.`customer` (`id`, `name`, `password`, `role`, `created_user`, `created_at`, `updated_user`, `updated_at`, `deleted_user`, `deleted_at`, `version`) VALUES ('admin','管理者','$2a$10$F9PClZY7wQBuNHRzqI55rug.3mN55lH6M1.BRYT.rat1hQeij/TJ6','ROLE_ADMIN','system','2021-01-30 19:55:00','system','2021-01-30 19:55:00',null,null,'0'), ('user','一般ユーザ','$2a$10$F9PClZY7wQBuNHRzqI55rug.3mN55lH6M1.BRYT.rat1hQeij/TJ6','ROLE_USER','system','2021-01-30 19:55:00','system','2021-01-30 19:55:00',null,null,'0'), ('super','スーパーユーザ','$2a$10$F9PClZY7wQBuNHRzqI55rug.3mN55lH6M1.BRYT.rat1hQeij/TJ6','ROLE_ADMIN,ROLE_USER','system','2021-01-30 19:55:00','system','2021-01-30 19:55:00',null,null,'0'); |
パスワードは、「password」をBCryptPasswordEncoder()でエンコードした値を保持しています。
実装
SpringSecurityの設定
配置場所:/src/main/java/com/example/demo/SecurityConfig.java
|
1 2 3 4 5 6 7 8 9 10 11 12 13 14 15 16 17 18 19 20 21 22 23 24 25 26 27 28 29 30 31 32 33 34 35 |
package com.example.demo; import org.springframework.context.annotation.Bean; import org.springframework.context.annotation.Configuration; import org.springframework.security.config.annotation.web.builders.HttpSecurity; import org.springframework.security.config.annotation.web.configuration.EnableWebSecurity; import org.springframework.security.config.annotation.web.configuration.WebSecurityConfigurerAdapter; import org.springframework.security.crypto.bcrypt.BCryptPasswordEncoder; import org.springframework.security.crypto.password.PasswordEncoder; @Configuration @EnableWebSecurity public class SecurityConfig extends WebSecurityConfigurerAdapter { @Bean public PasswordEncoder passwordEncoder() { return new BCryptPasswordEncoder(); } @Override protected void configure(HttpSecurity http) throws Exception { http.authorizeRequests() .antMatchers("/css/**", "/js/**").permitAll() .antMatchers("/admin/**").hasAuthority("ROLE_ADMIN") .anyRequest().authenticated(); http.formLogin() .usernameParameter("username") .passwordParameter("password") .defaultSuccessUrl("/", true) .failureUrl("/login-error"); // System.out.println("password : " + passwordEncoder().encode("password")); } } |
アノテーション
-
- @Configuration
設定用クラスであることを示すアノテーション
-
- @EnableWebSecurity
Spring Securityのウェブ用の機能を利用するためのアノテーション
http.authorizeRequests()
-
- antMatchers(“/hoge/**”)
一致するディレクトリの指定です。(上記例は、hogeディレクトリ配下全てを示す)
-
- permitAll()
アクセスを許可します。
-
- asAuthority(“ROLE_ADMIN”)
指定した(ROLE_ADMIN)の権限を有するユーザのみアクセスを許可します。
-
- anyRequest().authenticated()
条件に一致しないすべてのURLへのアクセスは、ユーザ認証のみを要求します。
formLogin()
-
- usernameParameter(“username”)、passwordParameter(“password”)
ログイン画面のname属性(“username”等)を、
ログインユーザ名とログインパスワードとして取得する。
-
- defaultSuccessUrl(“/”, true)
第1引数はログイン成功時のデフォルトのアクセスURLです。
第2引数はデフォルトアクセスURLへの遷移を強制するかの指定です。
true :”/”に遷移
false:認証前に遷移しようとした遷移先
(“/hoge/page/1″に遷移しようとしてログイン認証を要求された場合、ログイン後は”/hoge/page/1″に遷移する)
-
- failureUrl(“/login-error”)
ログイン認証に失敗した場合に遷移するURL。
System.out.println("password : " + passwordEncoder().encode("password"));
⇒インポートデータの「password」をエンコードするために仮実装したもの。
ログイン認証機能
Model
ユーザ情報テーブル(Customer)に対応するModelオブジェクトを用意します。
|
1 2 3 4 5 6 7 8 9 10 11 12 13 14 15 16 17 18 19 20 |
package com.example.demo.domain.model; import java.util.Date; import lombok.Data; @Data public class Customer { private String id; private String name; private String password; private String role; private String created_user; private Date created_at; private String updated_user; private Date updated_at; private String deleted_user; private Date deleted_at; private int version; } |
Repository
ユーザ情報テーブル(Customer)にアクセスするレポジトリーを用意します。
|
1 2 3 4 5 6 7 8 9 10 |
package com.example.demo.domain.repository; import org.apache.ibatis.annotations.Mapper; import com.example.demo.domain.model.Customer; @Mapper public interface CustomerRepository { public Customer findById(String username); } |
Mapper
Mapper用のXMLを用意します。
Repositoryと同じ階層となるように配置する必要があるので、以下のようにします。
また、名称も同じにする必要がありますので揃えておきます。
Repository:src/main/java/com/example/demo/domain/repository/CustomerRepository.java
XML :src/main/resources/com/example/demo/domain/repository/CustomerRepository.xml
|
1 2 3 4 5 6 7 8 9 10 11 12 13 14 15 16 17 18 19 20 21 22 23 24 |
<?xml version="1.0" encoding="UTF-8"?> <!DOCTYPE mapper PUBLIC "-//mybatis.org//DTD Mapper 3.0//EN" "http://mybatis.org/dtd/mybatis-3-mapper.dtd"> <mapper namespace="com.example.demo.domain.repository.CustomerRepository"> <resultMap type="com.example.demo.domain.model.Customer" id="customer"> <id column="id" property="id"></id> <result column="name" property="name"></result> <result column="password" property="password"></result> <result column="role" property="role"></result> <result column="created_user" property="created_user"></result> <result column="created_at" property="created_at"></result> <result column="updated_user" property="updated_user"></result> <result column="updated_at" property="updated_at"></result> <result column="deleted_user" property="deleted_user"></result> <result column="deleted_at" property="deleted_at"></result> <result column="version" property="version"></result> </resultMap> <select id="findById" resultMap="customer"> SELECT * FROM customer WHERE id = #{username} AND deleted_at IS NULL </select> </mapper> |
UserDetails
UserDetailsを継承したCustomerDetailsを実装します。
これはユーザ情報を保持するクラスであり、権限やアカウントの状態を扱います。
|
1 2 3 4 5 6 7 8 9 10 11 12 13 14 15 16 17 18 19 20 21 22 23 24 25 26 27 28 29 30 31 32 33 34 35 36 37 38 39 40 41 42 43 44 45 46 47 48 49 50 51 52 53 54 55 56 57 58 |
package com.example.demo; import java.util.Collection; import org.springframework.security.core.GrantedAuthority; import org.springframework.security.core.authority.AuthorityUtils; import org.springframework.security.core.userdetails.UserDetails; import com.example.demo.domain.model.Customer; public class CustomerDetails implements UserDetails { private Customer customer; public CustomerDetails(Customer customer) { this.customer = customer; } @Override public Collection<? extends GrantedAuthority> getAuthorities() { return AuthorityUtils.createAuthorityList(customer.getRole().split(",")); } @Override public String getPassword() { return customer.getPassword(); } @Override public String getUsername() { return customer.getName(); } @Override // アカウントが有効期限内であるか public boolean isAccountNonExpired() { return true; } @Override // アカウントがロックされていないか public boolean isAccountNonLocked() { return true; } @Override // 資格情報が有効期限内であるか public boolean isCredentialsNonExpired() { return true; } @Override // 有効なアカウントであるか public boolean isEnabled() { return true; } } |
-
- getAuthorities()
権限をCollectionで返します。
ユーザ情報テーブル(Customer)では、roleカラム内に,(カンマ)で区切って複数の権限を保持するようにしていますので、AuthorityUtils.createAuthorityListメソッドの引数に、カンマでsplitした結果の配列を返すこととしています。
※superユーザのroleカラムを参照
-
- getPassword(), getUsername()
ユーザIDとパスワードを返すGetterです。
-
- isAccountNonExpired(), isAccountNonLocked(), isCredentialsNonExpired(), isEnabled()
アカウントが有効であるかを検証する各種の設定です。
特に実装はおこないませんが、ログインできるように全てtrueに設定します。
Service
UserDetailsServiceクラスを継承したCustomerServceクラスを実装します。
検索するユーザが存在すれば、UserDetailsを返します。
もしなければ、UsernameNotFoundExceptionがthrowされます。
|
1 2 3 4 5 6 7 8 9 10 11 12 13 14 15 16 17 18 19 20 21 22 23 24 25 26 27 |
package com.example.demo.service; import org.springframework.beans.factory.annotation.Autowired; import org.springframework.security.core.userdetails.UserDetails; import org.springframework.security.core.userdetails.UserDetailsService; import org.springframework.security.core.userdetails.UsernameNotFoundException; import org.springframework.stereotype.Service; import com.example.demo.CustomerDetails; import com.example.demo.domain.model.Customer; import com.example.demo.domain.repository.CustomerRepository; @Service public class CustomerServce implements UserDetailsService { @Autowired private CustomerRepository customerRepository; @Override public UserDetails loadUserByUsername(String username) throws UsernameNotFoundException { Customer customer = customerRepository.findById(username); if(customer == null) { throw new UsernameNotFoundException(username + " is not found"); } return new CustomerDetails(customer); } } |
ログイン画面
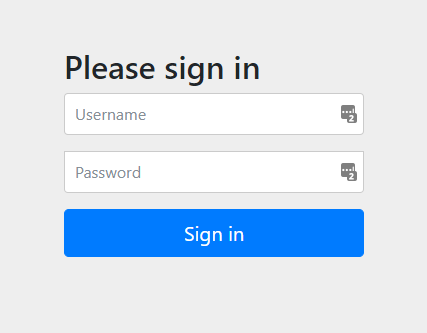
SpringSecurityで自動生成されるログインページです。
独自のログイン画面を実装することも可能なので、興味のある方は更に踏み込んでみて下さい。
(参考)
#3~ 独自のログイン画面
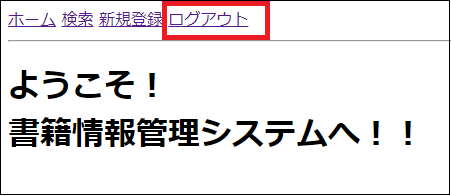
ログアウト
|
1 |
<a th:href="@{/logout}">ログアウト</a> |
/logoutにリンクを用意するだけでログアウトは実現できます。
ログアウト画面を独自に実装したい場合は独自に実装する必要はあります。
まとめ
- SpringSecurityの導入はMavenの構成管理(pom.xml)だと簡単に行える。
- ユーザ用のテーブルを用意すること。
また、権限カラム(role)で権限を設定可能になる。 - SpringSecuriyの設定用クラスには、@Configurationと@EnableWebSecurityアノテーションを付ける。
- デフォルトのログイン画面が用意されているので、カスタマイズしたい場合のみ作成する。
- ログアウトはデフォルトの機能が用意されているので、カスタマイズしたい場合は実装を行う。
参考

後悔しないためのSpring Boot 入門書:Spring 解体新書(第2版): Spring Bootが丸分かり Spring解体新書![]()


コメント
コメント一覧 (2件)
参考にさせていただいております。
ログイン認証については初心者なのでよくわかりません。
上記と同じように実装し、Customerテーブルに同じようにINSERTしました。
さて、ログイン画面を表示したのですがそれからINSERTしたデータにもとづいてどのようにパスワードを入力したらいいのか。よくわかりません。
また、新たにユーザーを登録する場合はどうすればよいのでしょう。
その辺をご説明いただけると嬉しいです。
よろしくお願いいたします。
他のサイトを参照しなんとか理解できましたので、質問は取り下げます。
お手数をおかけしてすみませんでした。